CX Cloud for Salesforce
Auvious can also be integrated with Salesforce via Genesys Cloud. The process is really simple.
Prerequisites
Before adding auvious in Salesforce we need it to be installed in your Genesys Cloud platform. Follow the instructions in our Genesys cloud installation page.
Once auvious has been installed, we need the Application URL.
Go to Genesys Cloud / Admin / Integrations / Auvious and select the Configuration tab. Copy the Application URL and paste it into a notepad.
The URL should look like this:
https://auvious.video/welcome?pcEnvironment={{pcEnvironment}}&lang={{pcLangTag}}&aid=abc123-abc123-1234-8765-abc1233ab6a5f
Please note that auvious.video maybe different for your instance. Also the aid will be unique to your integration. At any circumstances do NOT copy/paste the above URL.
- Replace
{{pcEnvironment}}with your genesys cloud enviroment - Replace
{{pcLangTag}}with the desired language, in an ISO format (ex: en-US)
Once you have replaced the above variables the URL should look like this:
https://auvious.video/welcome?pcEnvironment=mypurecloud.de&lang=en-us&aid=abc123-abc123-1234-8765-abc1233ab6a5f
Visualforce Page
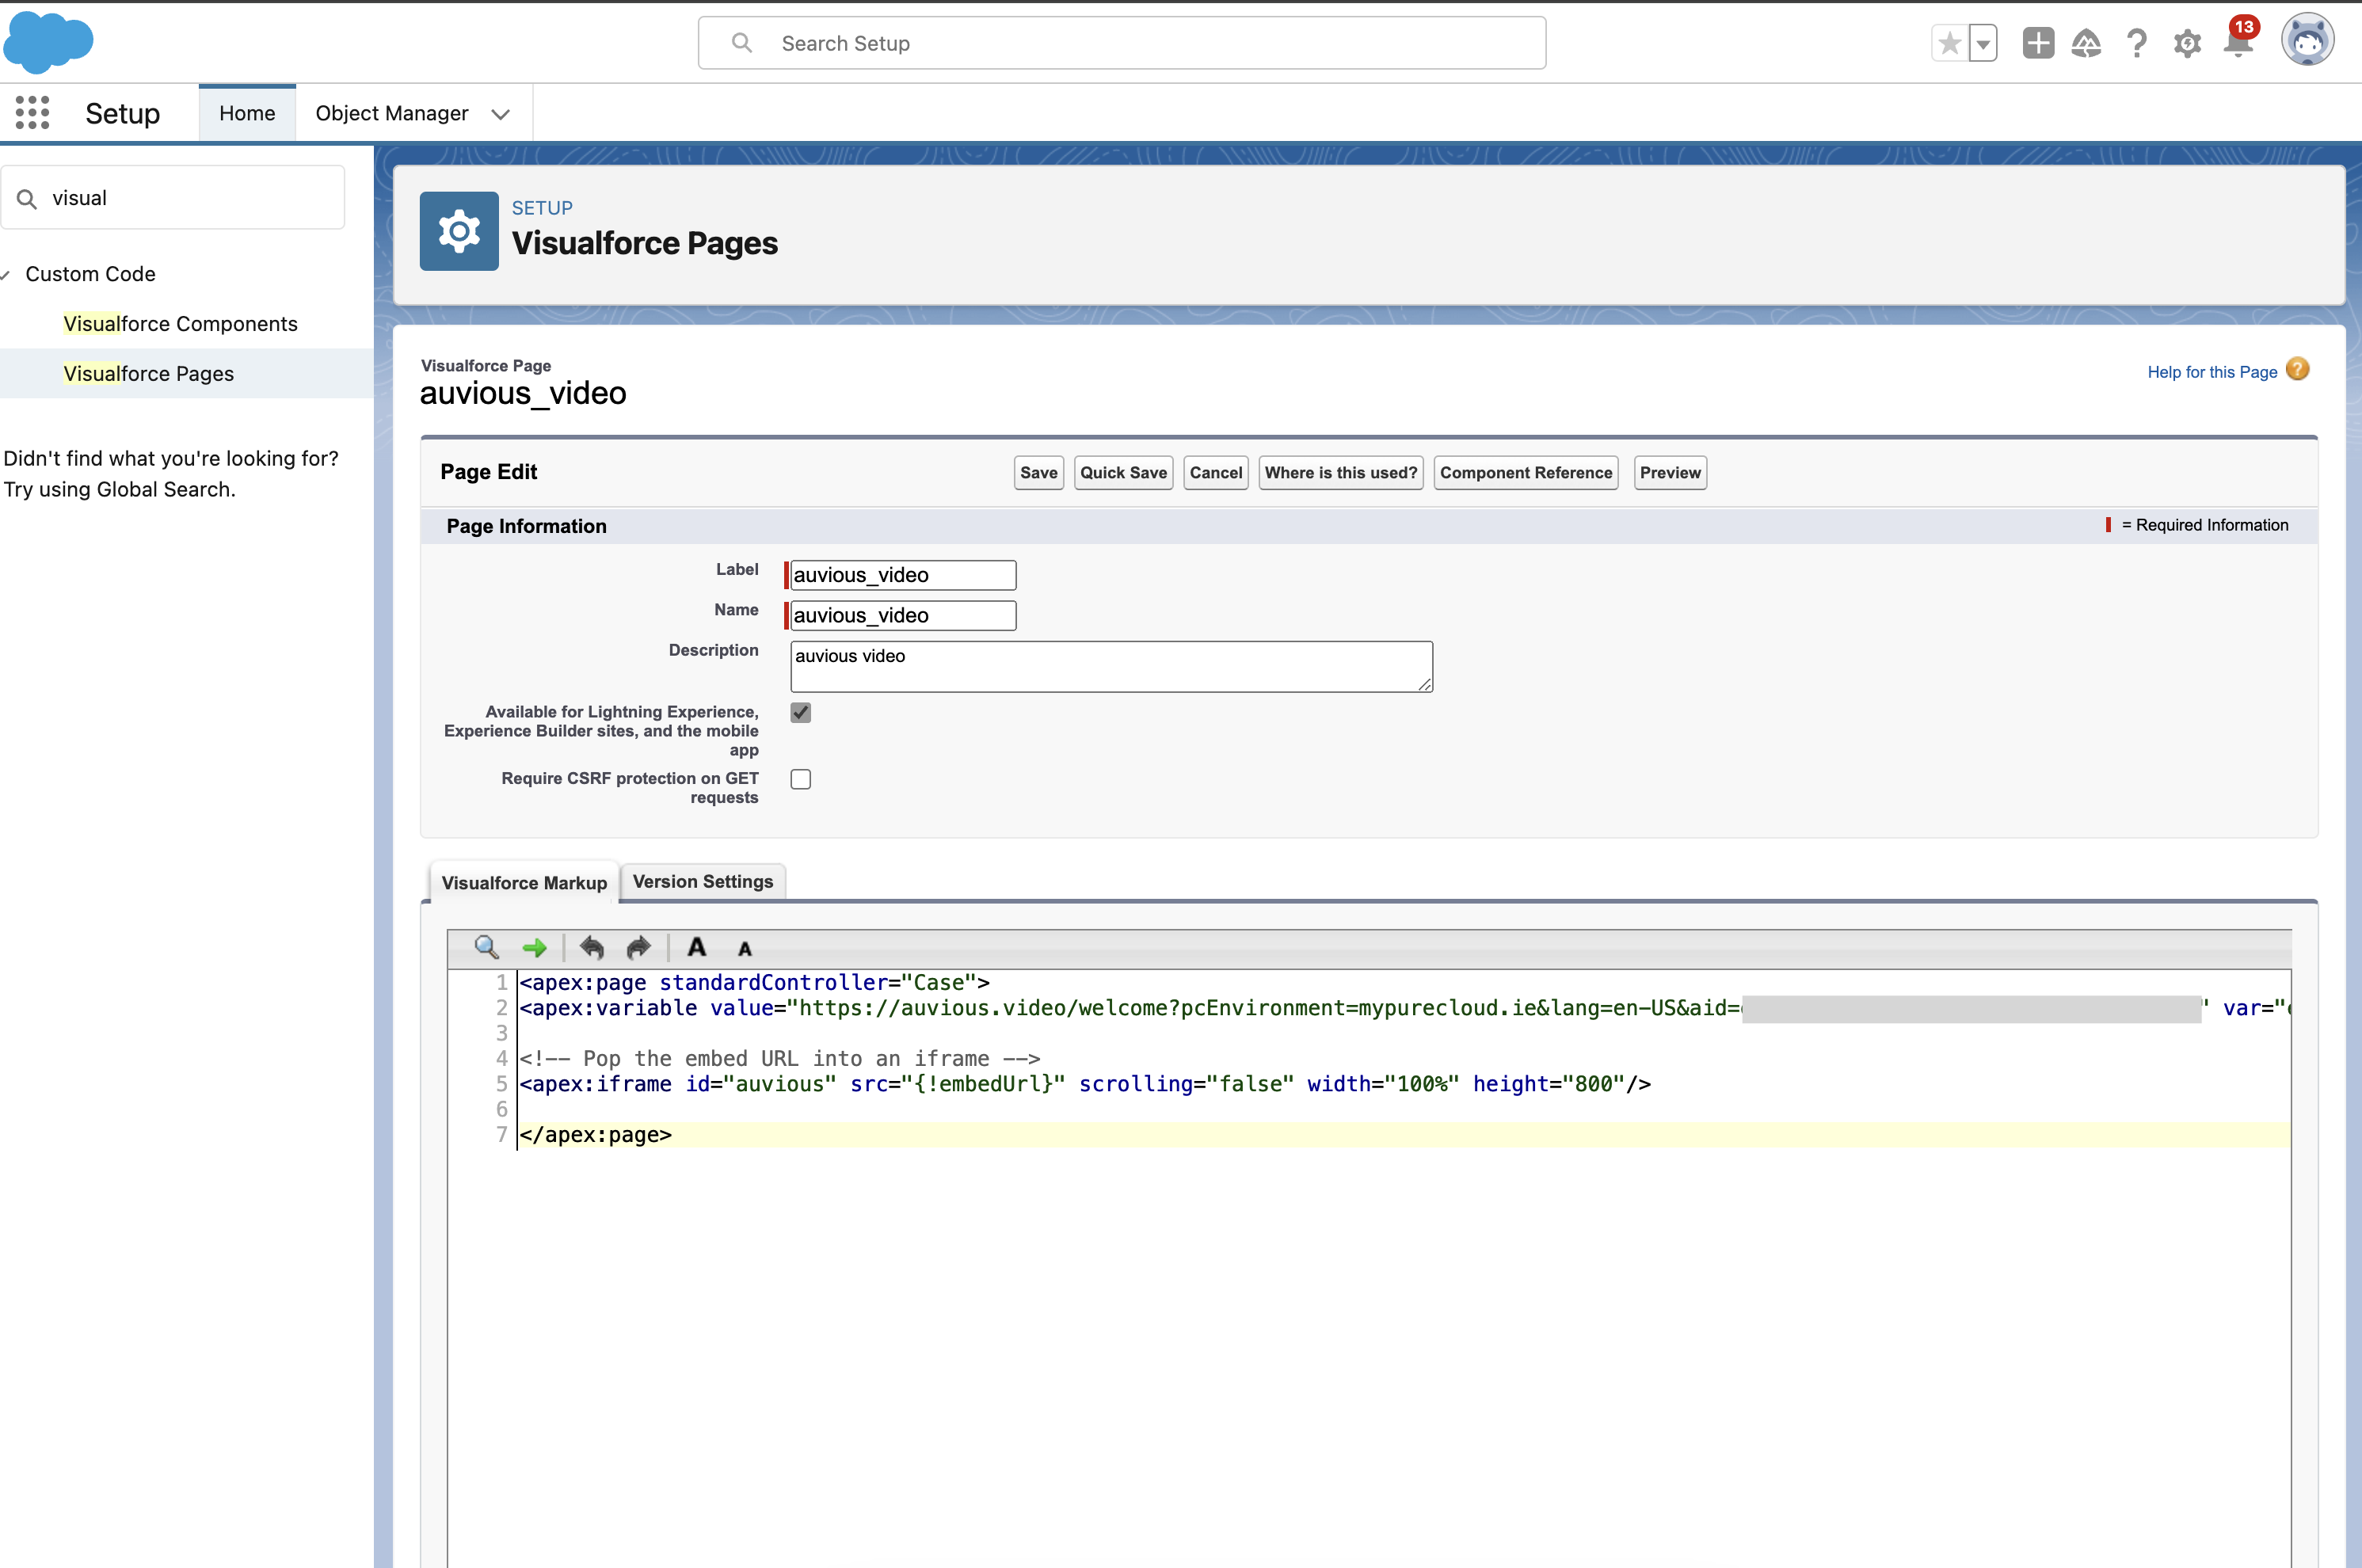
Create a visualforce Page. We need this page to host auvious through an iFrame. Give it a Label and a Name.
Copy and paste the code below.
Don't forget to replace <YOUR_APPLICATION_URL> with the actual URL above.
<apex:page standardController="Case">
 <apex:variable value="<YOUR_APPLICATION_URL>" var="embedUrl">

 <!- Pop the embed URL into an iframe ->
 <apex:iframe id="auvious" src="{!embedUrl}" scrolling="false" width="100%" height="800" allow="camera; microphone; geolocation; fullscreen; display-capture; autoplay;"/>

</apex: page>

Next steps
Once you have created the visualforce page then:
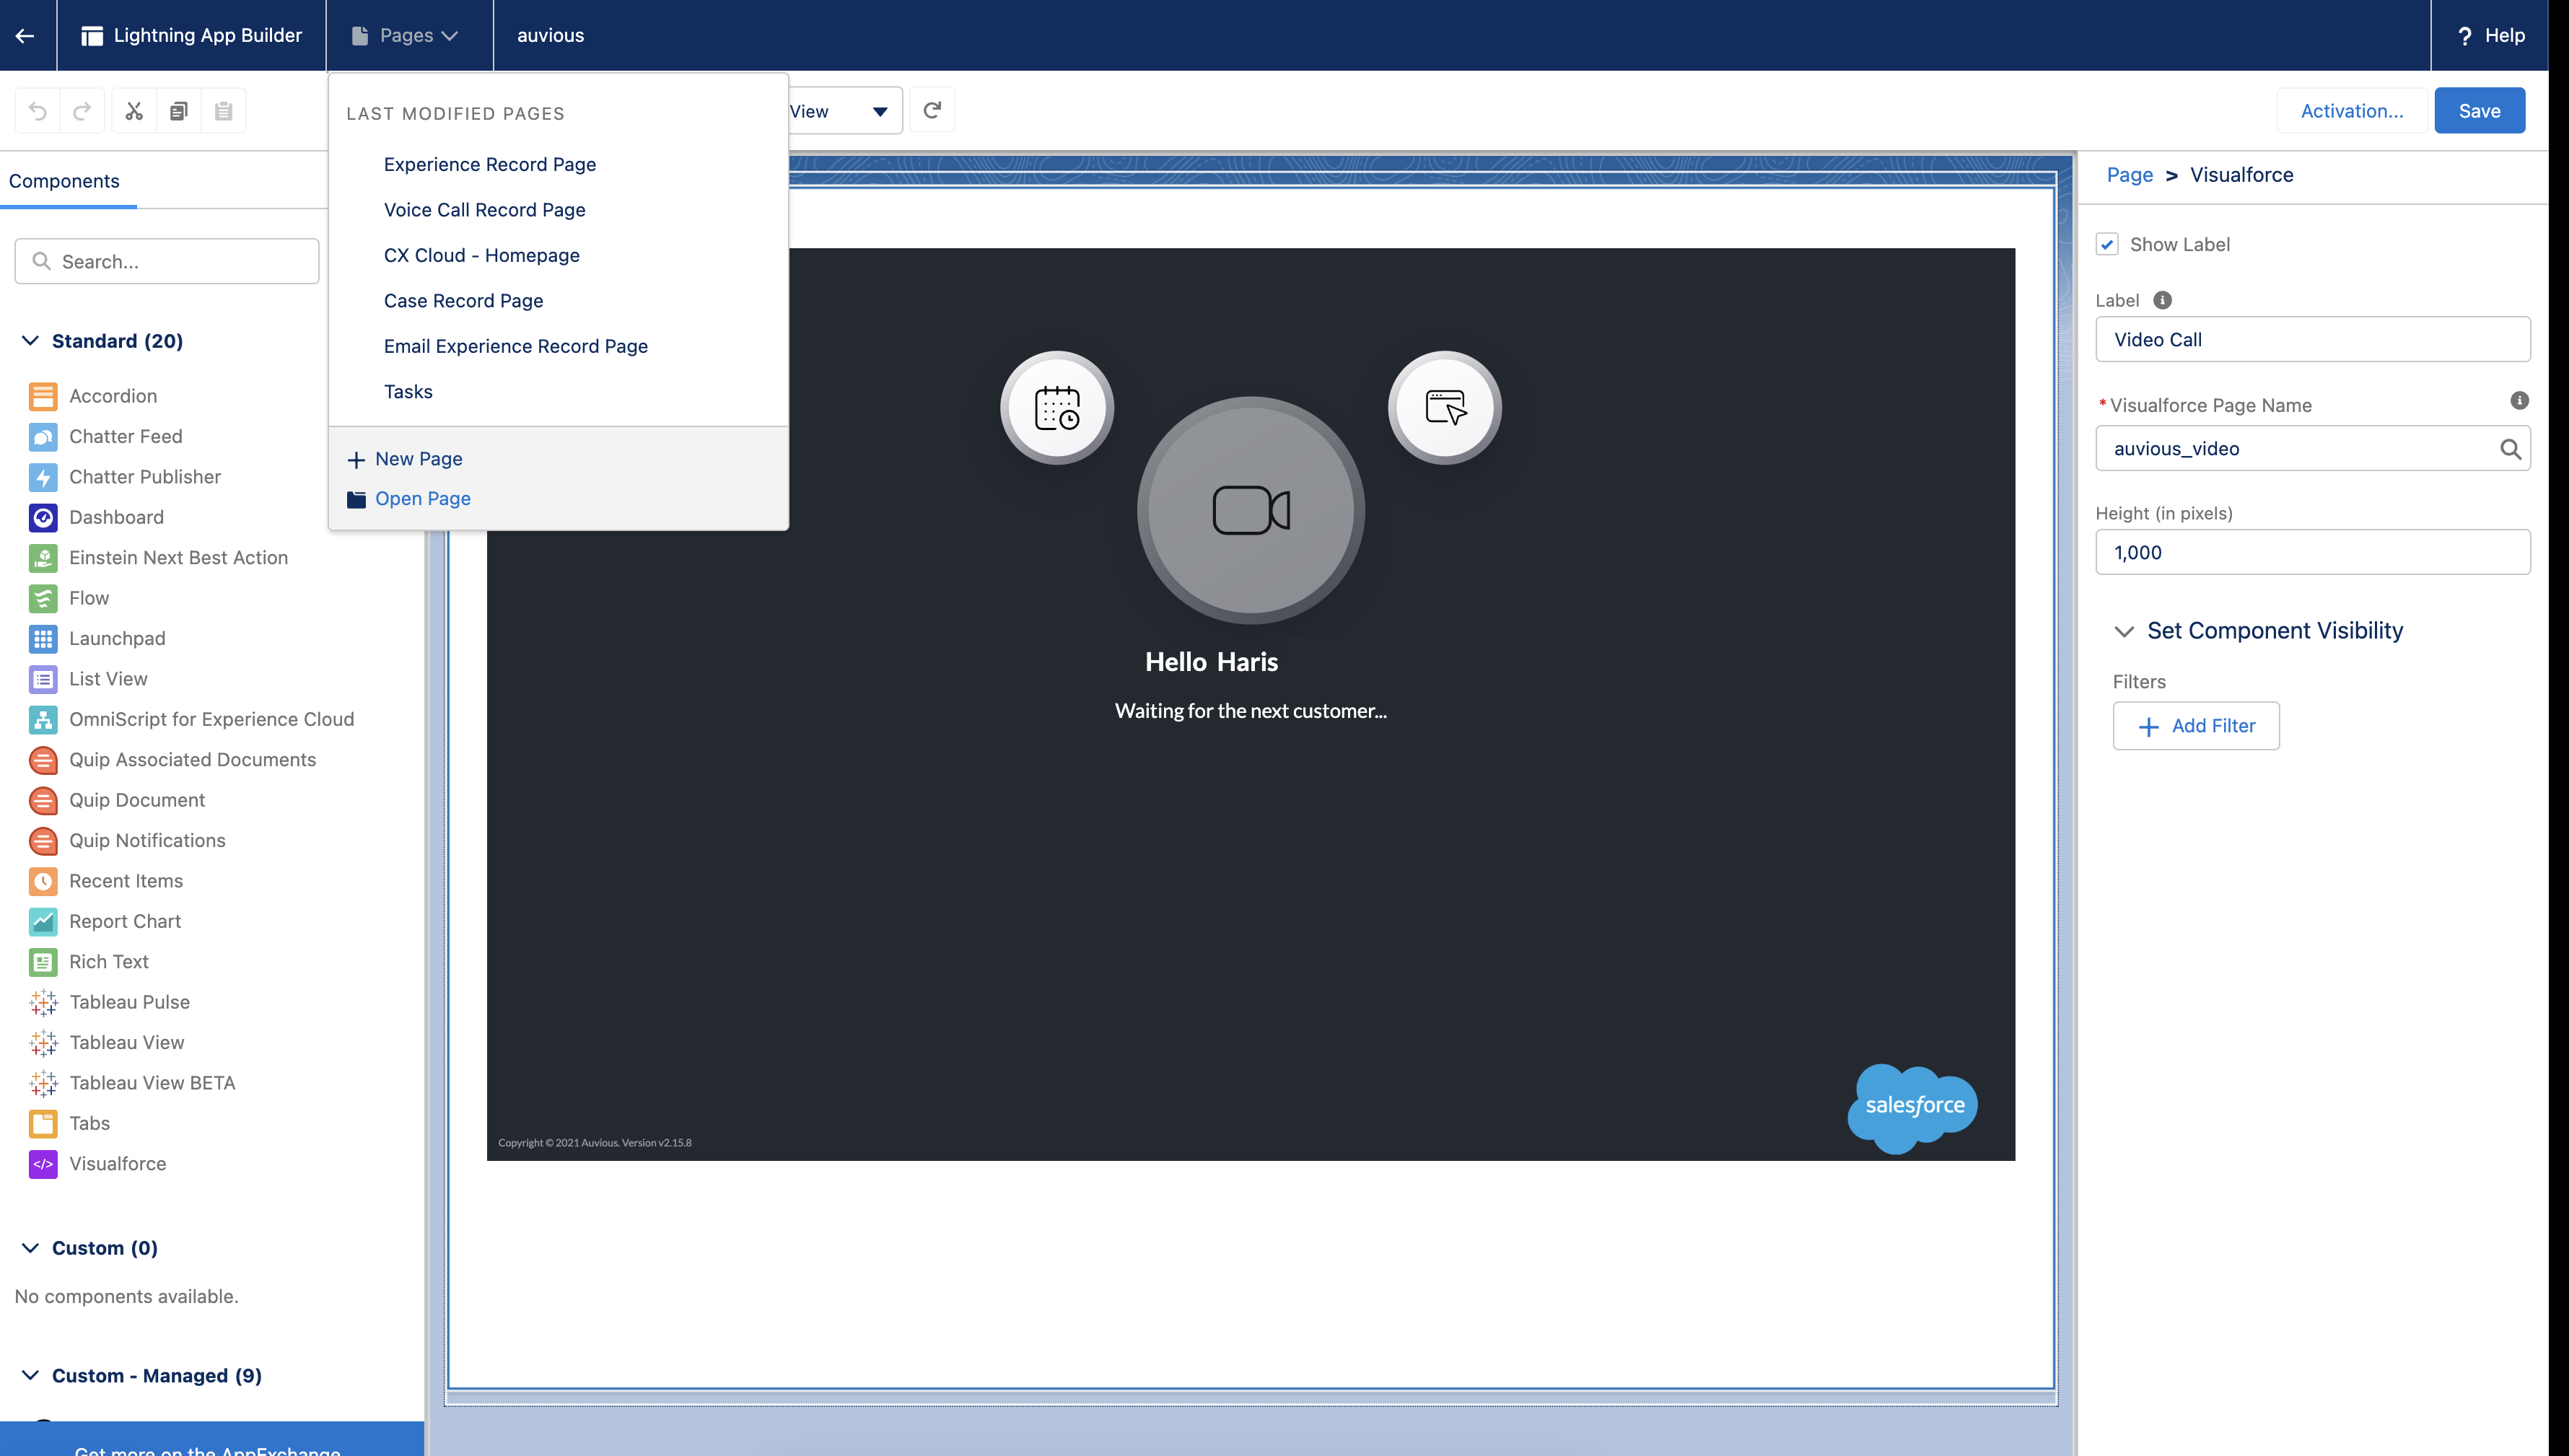
- Create a new Page Layout and select the visualforce component above to load.
- Pin the tab and change the icon to the 'video camera'.
Screen sharing the agent's screen is not currently supported.
