Appointments Configuration
In order to enable appointments navigate to the settings page and open the Scheduled video calls section.
Genesys Cloud configuration
Appointments in Genesys Cloud can be configured to route either to a specific agent or to a queue. For active deployments, use Genesys Web Messaging in Settings / Call Scheduling / Appointments. For full setup steps, refer to our Genesys Cloud setup guide.
Talkdesk configuration
Appointments in Talkdesk require a Digital Connect integration to be set up in Talkdesk. Read our Talkdesk Digital Connect guide on how to setup a Digital Connect integration and the visit our Talkesk setup guide on how to configure appointments in Talkdesk.
Custom duration
By default, the available options for appointment durations created by an agent are 5, 15, and 30 minutes. You can customize these options by modifying, removing, or adding new durations in Settings / Call Scheduling / Appointment.
Notifications
Outbound notifications stay off until an admin enables them and configures valid SMS/email credentials (Genesys). Talkdesk uses webhooks only.
Delivery is gated by two switches:
- The current org-wide notification toggle (admin controlled).
- The per-appointment state captured at scheduling time. If the appointment was created while notifications were off, no reminders/follow-ups will go out later even if you re-enable globally.
Supported channels:
- SMS (Genesys Agentless, with provisioned SMS number and valid OAuth credentials)
- Email (Genesys Agentless, with configured email domain and valid OAuth credentials)
- Webhooks (Genesys and Talkdesk)
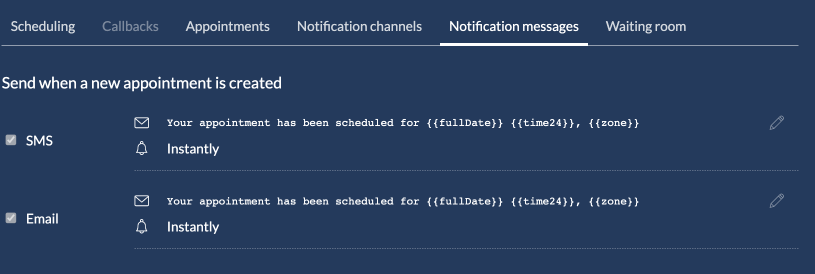
Customer-facing messages are sent only for:
- Create and Reschedule: sent immediately; include the join link because Automatically activate an appointment is enabled by default.
- Cancel: sent immediately.
- Reminders: sent at configured offsets; missed windows are not replayed.
- Follow-up: sent only to customers who actually joined.
Metadata-only updates do not trigger emails/SMS; only webhook subscribers see update payloads.
ROOM/invite notices are sent only when Automatically activate an appointment is off. They are scheduled based on the configured ROOM offset (relative to the appointment start time). If the scheduled send time is missed (for example due to service downtime or delayed processing), the service will attempt to send the notice only within the next 5 minutes after that scheduled time. If the 5-minute retry window is exceeded, the invite is skipped and will not be sent later. When Automatically activate an appointment is on, appointments activate immediately when scheduled and ROOM/invite notices are not sent; reminder notifications still send at their configured offsets.
Reminder and follow-up behavior: any pending reminders or invites are cancelled as soon as the call starts or the appointment is rescheduled. Reminders allow up to a one-minute tolerance around their configured offsets and are not replayed if missed. Follow-ups are scheduled at their configured offsets after the appointment ends. Offsets come from the templates you configure; there is no built-in default cadence.
Automatically activate an appointment is enabled by default. In the UI, once it is enabled and saved, the option is no longer shown for that application. For legacy apps where it is off, the toggle remains visible so it can be enabled. When Automatically activate an appointment is off, appointments remain scheduled until they are explicitly activated.
Agents can only view appointments assigned to them is enabled by default. When enabled, agents and client-service users only see appointments where they are the organizer or the assigned agent. Supervisors are not restricted by this setting.
The appointment url is available in the created, rescheduled, and updated events. If you cannot find it, verify Automatically activate an appointment is enabled for the application.
Webhooks setup
You can also use our webhooks service to get notified about appointment events and notify the customer or update your CRM system accordingly. You can find more information in our webhooks management section.
Waiting screen options
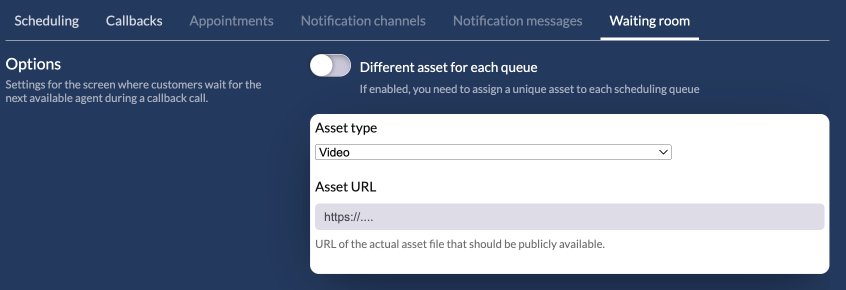
Whether you use callbacks or appointments, the customer will land on a waiting room before they join the call. You can use this page to show a video or an image to the customer, while waiting. If you choose a video, due to browser restrictions, the video will start playing muted. You will have to host the video/image files to your own CDN. We require only the secure URL of the asset.
Genesys Cloud
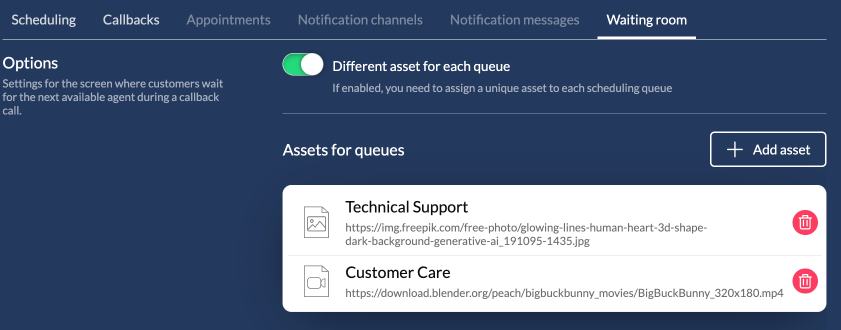
We also offer the ability to have different assets (either video or image) per queue. If you enable this option, you will now be able to add one or more assets. Click on the 'add asset button', select a queue and set the url. Repeat this flow for each queue. Don't forget to Save the changes.
If your business flow is based on appointments which are created by an agent and not by a customer using our widget, you cannot set an asset per queue. This is because an appointment that is created by an agent routes back to the specific agent and not to a queue.
Assets for queues is supported only in Genesys Cloud.