Actions
Actions provide a way for Talkdesk to communicate with third party services and retrieve information. In our case we need actions to authenticate with our service and generate customer and agent video urls that they can use to join a call. To start using actions we need to establish a secure connection with our services. For this we need to create some Client Credentials on auvious.
Step 1. Client Credentials
Our API uses OAuth2 Client Credentials as the authentication mechanism. You will need a Client ID and Client secret in order to access our APIs and create the links that will be shown in the context menu.
Once auvious is installed, open it and go to Settings.
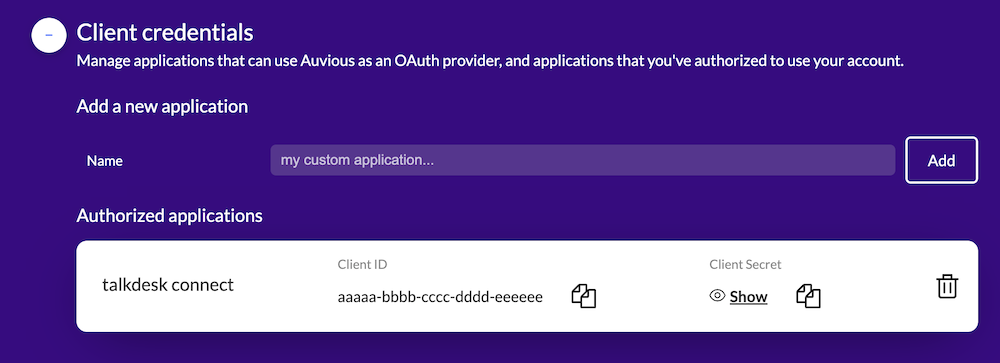
Open the section Client Credentials. Give a name to your application (such as Talkdesk connect) and click Add.
A Client ID and secret pair will be created. Copy both the Client ID and Client Secret into a secure document, we will need them in the next step.
Step 2. Create an integration
Integrations are the first step of creating and displaying contextual information.
- Go to Builder -> Integrations -> Add integration
- Select Custom integration
- Give a name and description
- Set the
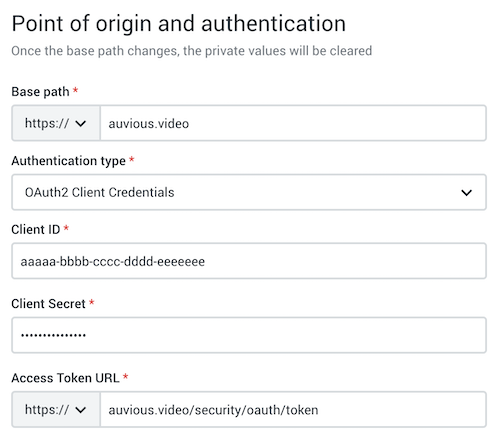
base pathtoauvious.video - Set the
Authentication typetoOAuth2 Client Credentials - Paste the
Client IDandClient Secretyou created in the previous step in the corresponding fields. - Set the
Access Token URLtoauvious.video/security/oauth/token - Leave the headers empty
- Save
Step 3. Create an action
Once the integration has been created, go to the Actions tab and create a new action.
- Give a name and description
- Change the action method to
POST - Set the action path to
/security/facades/room - Set the input schema to this
{
  "$schema": "http://json-schema.org/draft-07/schema",
  "title": "Root Schema",
  "type": "object",
  "required": ["applicationId", "cdestination", "customerId", "interactionId"],
  "properties": {
    "applicationId": {
      "title": "The application Id",
      "type": "string"
    },
    "cdestination": {
      "title": "The conversation destination",
      "type": "string"
    },
    "customerId": {
      "title": "The customer Id",
      "type": "string"
    },
    "interactionId": {
      "title": "The interaction Id",
      "type": "string"
    },
    "organizationId": {
      "title": "The organization Id",
      "type": "string"
    },
    "ticketExpirationSeconds": {
      "title": "The ticket validity period in seconds",
      "type": "integer"
    },
    "urlBase": {
      "title": "The Base URL",
      "type": "string"
    }
  },
  "additionalProperties": false
}
- Set the output schema to this
{
  "$schema": "http://json-schema.org/draft-07/schema",
  "title": "Root Schema",
  "type": "object",
  "required": ["agentUrl", "recordingUrl", "ticketUrl"],
  "properties": {
    "agentUrl": {
      "title": "The url the agent has to open",
      "type": "string"
    },
    "recordingUrl": {
      "title": "The url holding the recording, if any",
      "type": "string"
    },
    "ticketUrl": {
      "title": "The url that should be sent to the customer",
      "type": "string"
    }
  }
}
- Click Publish
Step 4. Test the action
Once the action has been created you will be able to test it. Click on the newly created action and on the new page, click on Test action.
Before testing the application you will need to get your application id from auvious. Simply open auvious and go to settings. The application ID is at the top right. Copy it.
Paste this input JSON
{
  "applicationId": "<your-application-id>",
  "cdestination": "standalone",
  "customerId": "abc123",
  "interactionId": "abc123",
  "ticketExpirationSeconds": 0,
  "organizationId": "talkdesk",
  "urlBase": "auvious.video"
}
Click Execute. If everything is correct you should be able to get a sucessfull response (200) and a JSON containing three urls.
Next steps
Now that you have setup the integration and the actions, there are various ways you can use auvious in Talkdesk.
The simplest way is to generate a customer and agent link whenever a new conversation starts. Visit Context Links for more information.
You can also have auvious be a part of the agent's dashboard and open in a card with every new conversation. Visit Canvas sidebar for more.