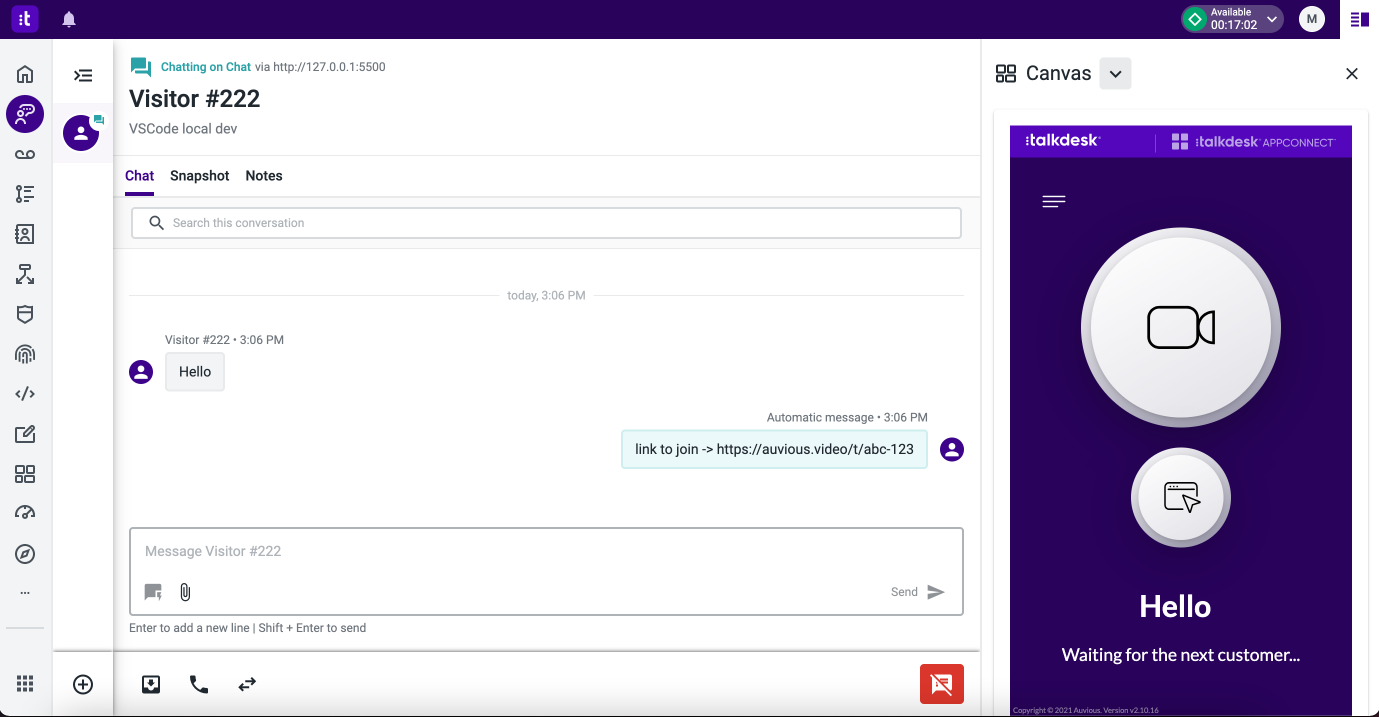
Canvas sidebar
Auvious can be loaded as a sidebar in the agent's dashboard, while a conversation is active.
You can find the auvious integration in Talkdesk AppConnect.
Workspace Designer
Talkdesk offers an intuitive tool called Workspace Designer that allows you to quickly build, expand, and customize the ideal interface for every role in the contact center. To begin using Workspace Designer, you need to install the Workspace Designer application (app) in Workspace.
Once you have the Workspace Designer installed, visit the page by clicking the icon on the left sideba menu.
You can read more on what is Workspace Designer and the components here
Prerequisites
-
For our specific use case we will be using the 'Secondary area' component and the 'Cards app' component. You can install them by visiting Workspace Designer / Canvas.
-
Follow the instructions in the Actions page on how to install auvious and setup the core integration and actions required to authenticate to auvious and generate a customer and agent link.
Create a card
Click on 'Create card' and give it a name. Once you hit 'Create' you will be redirected to the automation designer to design the card.
Automation designer
- Open the
{ } Variablesmenu on the right. - Click on
Add variable. - Give a variable name, such as
url. - Select
Studioas the source of the variable. - type
agent_urlin the Path field.
From the components list on the left, find the Render View component and drag it on the designer. Double click the dropped component and on the menu on the right paste this code.
<Flex padding="1" direction="column" gap="1" width="100%" height="100%">
    { Context.getVariable('url')
     ? <iframe src={`${Context.getVariable('url')}`} width="100%" height="325" frameBorder="0" title="Auvious" allow="camera;microphone;display-capture;fullscreen;geolocation" scrolling="no" aria-hidden="false" sandbox="allow-forms allow-modals allow-popups allow-presentation allow-same-origin allow-scripts allow-downloads"></iframe>
     : <Text>No Video</Text>
     }
</Flex>
This code looks for a variable named 'url' in the context. If it finds it, it renders an iFrame withe the url, if not, it renders a 'No Video' tag.
The 'url' is the name of the variable we created above. This variable is mapped to the agent_url context variable that has been created in the flow and is populated once the action to generate a link has been called.
Once you're finished with the results click 'Save' and 'Publish'. You now have a new Card that you can assign to a Panel.
Panels
Click on 'Create panel' to create a new panel that will host the card we just created. Once you give it a name and save it, click on the pencil to edit the panel. Click on 'Add card' and select the card we created above. Click 'Save' and you are good to go.
Studio Flow
A flow is a powerful way to automate actions and populate context variables. A flow also allows you to send custom data from a Talkdesk widget and capture it using variables.
Click on 'Route to queue'
- On the
chat startedsection clickAdd new step - Select
Execute actionon the 'Component Type' list and give it a step name
Select the newly created step and fill in the Preferences
- Set the
applicationIdto the auvious application id found in auvious settings (value) - Set the
cdestinationtostandalone(value) - Set the
customeridto an incoming variable or to a fixed string (ex 'customer'). - Set the
interactionIdto theInteraction IDFlow variable - Set the
organizationIdto the organization id found in auvious. - set the
urlBasetohttps://auvious.video
Configure the Outputs
- Parsed Response
- Set
agentUrlto a flow variable (ex.agent_url) - Set
recordingUrlto a flow variable (ex.recording_url) - Set
ticketUrlto a flow variable (ex.customer_url)
The agent_url and the customer_url flow variables are studio variables that will be accessed by the Automation designer when setting up the card and the iFrame.
Automated message with the customer link (optional)
At this point you have the option to send an automated message to the conversation (and the customer).
- At the 'Exit / OK' step of the 'Execute Action' component, add an 'Automated message' component.
- Select the 'Automated message' component and set your preferred message. Get the customer url using this variable
%{current_flow.customer_url}. So for example a message could look like this.
Please follow this link %{current_flow.customer_url} to join the video call.
and that would translate to this
Please follow this link https://auvious.video/t/abc-123 to join the video call.
Now you are ready to have an end-to-end conversation using the Talkdesk widget and opening auvious in the agent canvas sidebar.
Exported version
You can download an exported version of the above instructions here