Snapshots
📸 Snapshots are a powerful onboarding tool for your call center.
✨ Capture high-quality photos of the customer's camera and categorize them.
A storage provider must be configured in order to use this feature.
Start a session
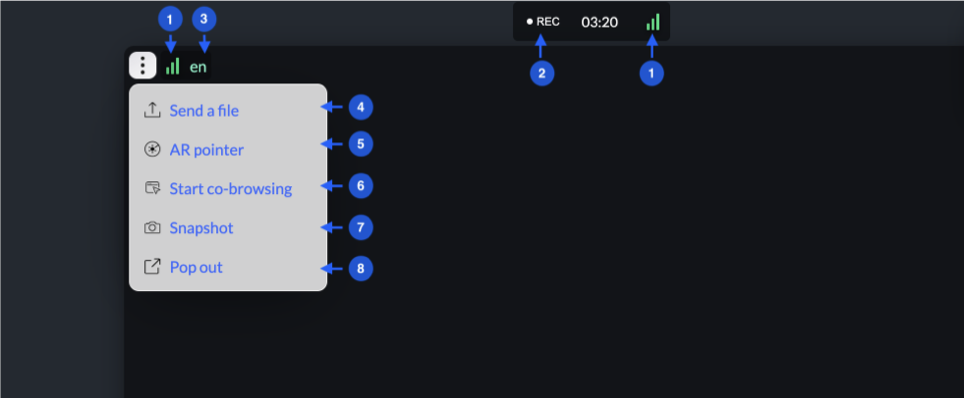
Starting a snapshot session is really easy. Just click on Snapshot (#7) and the snapshot area will appear.
 #7 Snapshot

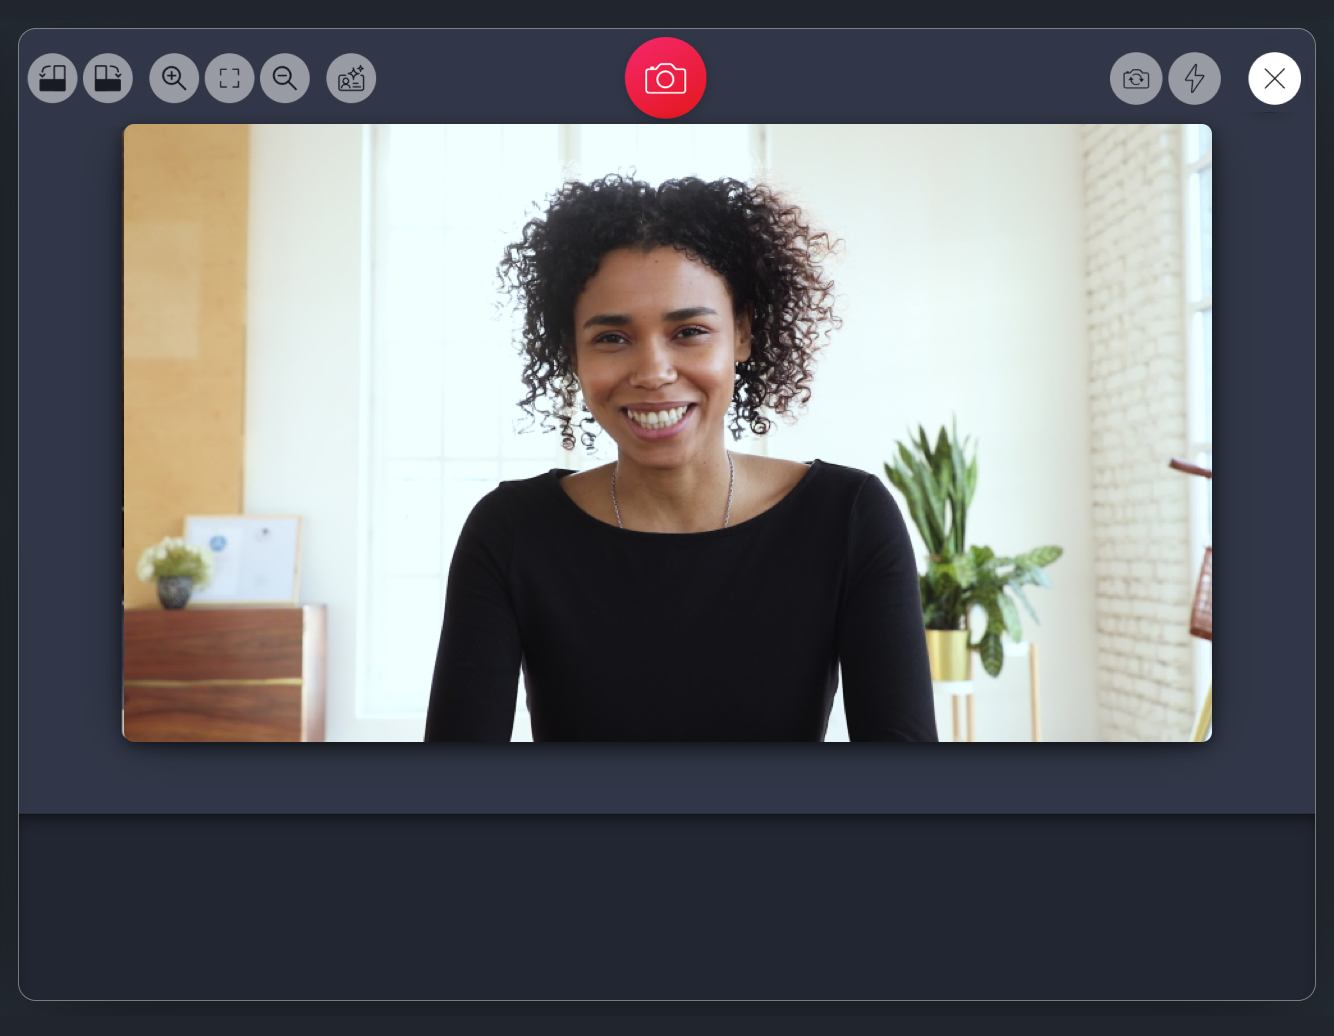
The snapshot controls area at the top is divided in 3 major areas, from left to right.
- Photo manipulation tools. Rotate, zoom and remove the background from photos.
- Take a Snapshot button.
- Remote control actions such as switch cam and toggle torch.
Every time you click on 2.Take a snapshot a new snapshot is taken. After a few seconds it appears on the bottom area where all the snapshots are.
Snapshots are taken in the customer's device and are sent back to the agent to review. This ensures the highest quality possible.
Preview photos
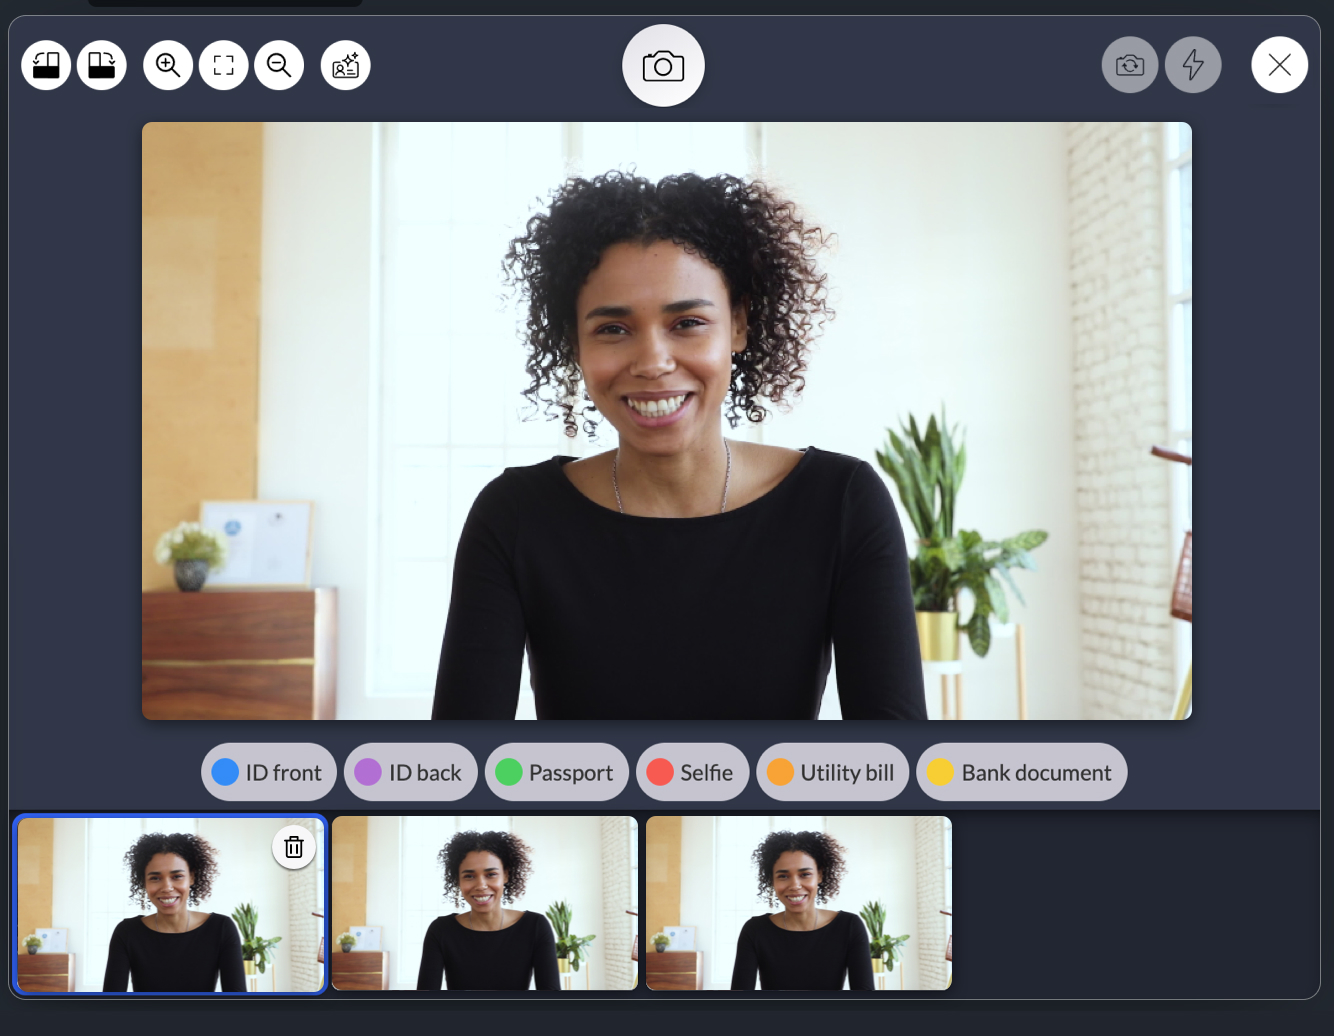
If you select a photo from the bottom area then you can review that specific photo or discard it. In order to get back to snapshot mode, click on 2.Take a snapshot button.

While a photo is selected you can perform the following actions.
- Rotate left / right.
- Zoom in / out.
- See the actual size.
- Clear the background.
- Add a category.
Snapshot ships with a default list of categories. You can add your own in Settings.
All the changes that are done here are for preview reasons only and the original photo is not modified or affected.
Use the "actual size" button to look closely on a photo that has letters (such as a passport photo) to see if all the letters are readable.
Clear background
This is a new feature that uses machine learning and AI to understand the object of the photo, segment it and remove the background, all done locally inside the agent's browser. It is enabled by default but you can always disable it in settings.
It is really helpful when scanning documents or taking photos of customers, to remove any background noise. The generated file is a .PNG with a transparent background. The original file is also preserved and can be found in the 'Rejected' section in the snapshot area of the interaction details.
This feature is not supported in the Genesys Cloud Desktop application.
Categorize and approve
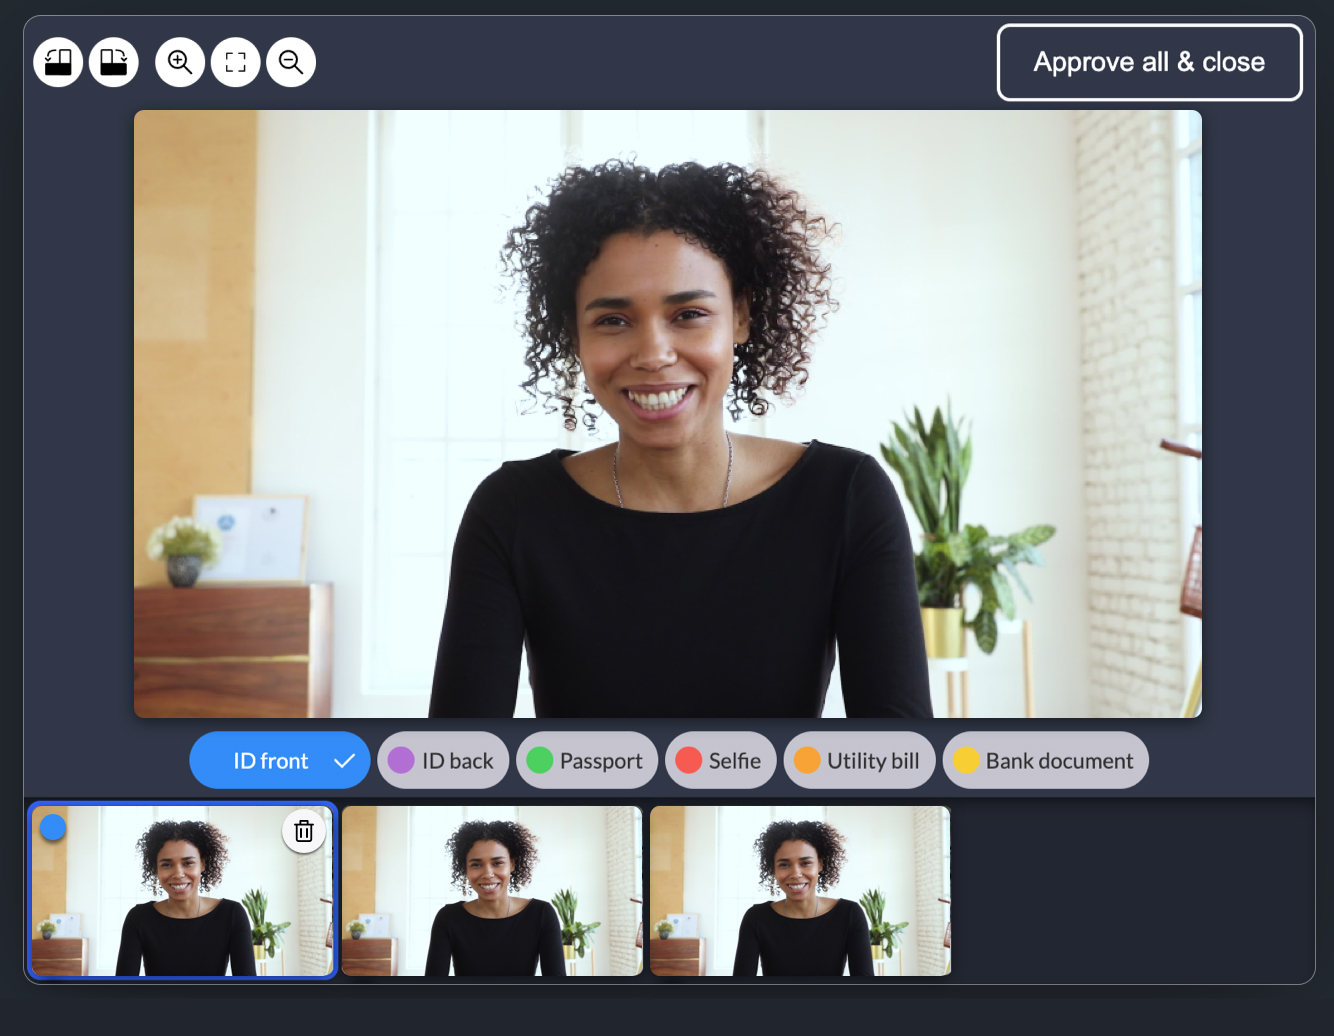
Once the call is ended the agent will be requested to review and approve the taken snapshots.

Here the agent can
- Discard any snapshots that do not meet the criteria (click the trash button)
- Preview the photos (zoom, rotate etc)
- Add a category to each photo.
All photos need to have a category. Once the review is done just click on 'Approve all & close'.
The discared photos are still visible in the Interactions section.