Widget Deployments
The widget supports two configuration methods:
- Set one or more attribute properties directly in the widget code (see Configuration Options below).
- Create a configuration object in Auvious Settings, then assign it to a Deployment (also located in Auvious Settings).
Benefits of using a Deployment ID
A Deployment ID allows you to assign multiple configurations to the same deployment. This enables you to deploy the widget code once, referencing a specific Deployment ID, and then update the linked configuration object at any time—without requiring additional widget deployments.
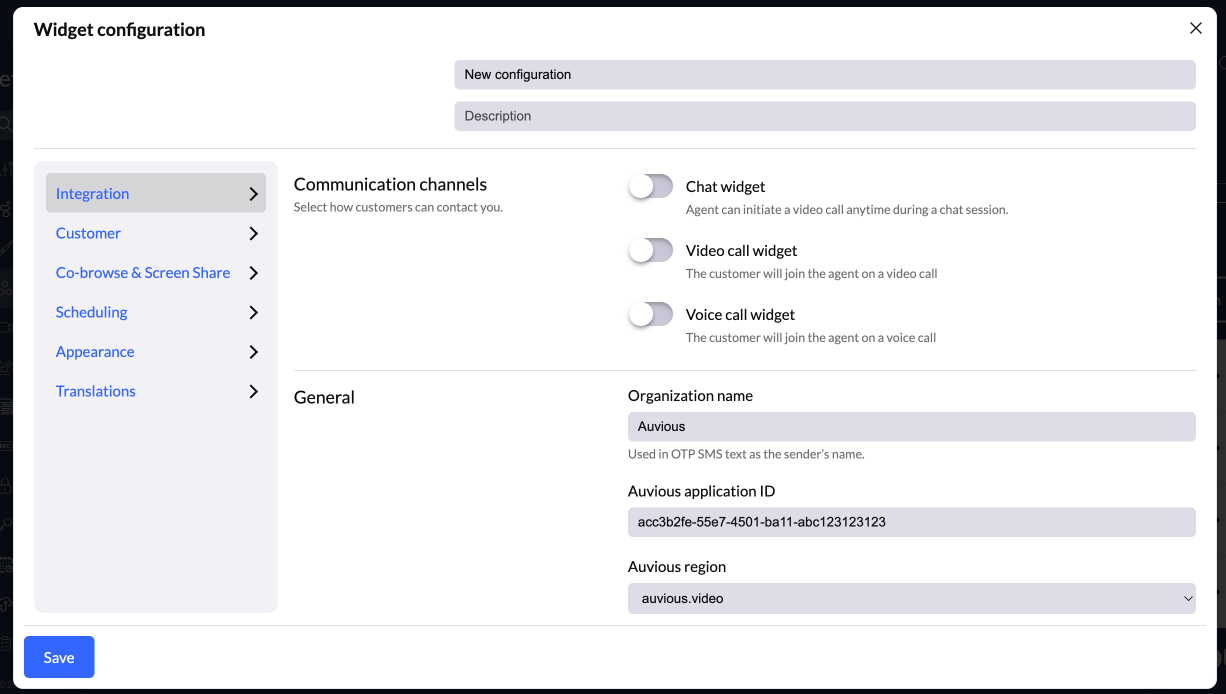
Configuration
You can create one or more configurations and switch between them. Each time a configuration is modified, a new version is generated. To apply changes, you must sync the Deployment to the desired version.
All previous versions remain accessible—you can view their settings at any time—but they are read-only and cannot be edited. Only the most recent (latest) version can be updated.
Many configuration options are contextual and will only appear when a related feature is enabled.
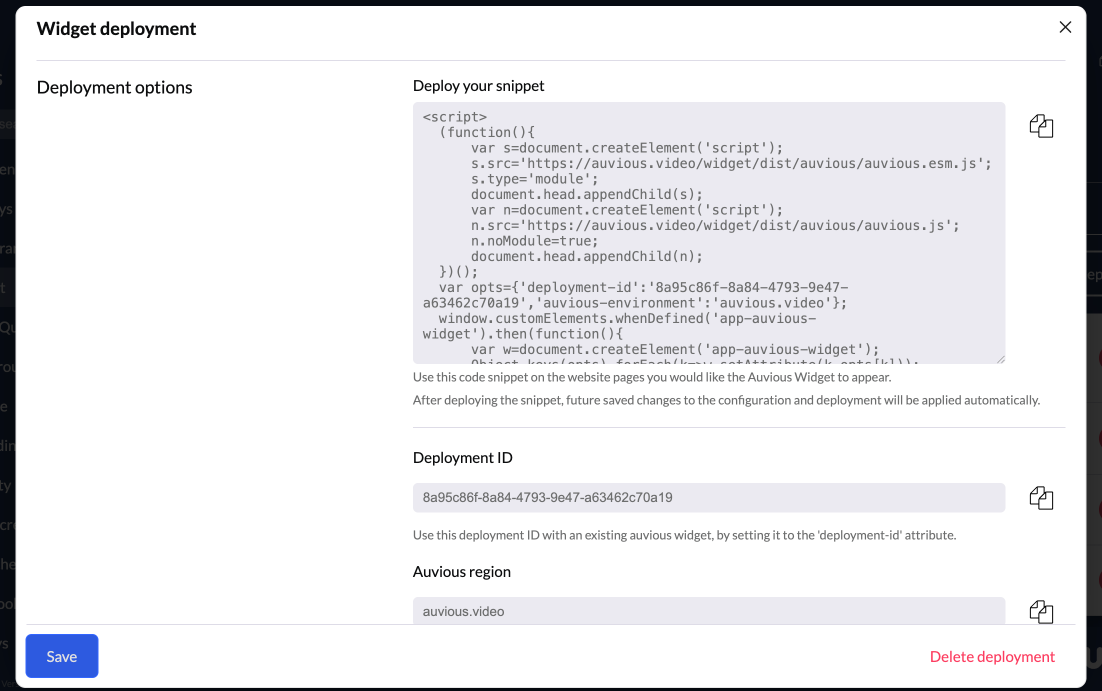
Deployment
To deploy an Auvious widget on your website, create a new Deployment and select the desired Configuration and its specific version.
After saving, you will be presented with two deployment options:
- Deployment Snippet — Copy the provided code snippet and paste it into your website’s HTML, ideally right before the closing
</body>tag. - Widget attributes — If Auvious is already installed on your site, add the
deployment-idattribute to the widget and set theauvious-environmentattribute by copying the Auvious Region value.